Rain, Rain Go Away….
Tuesdays with Tony
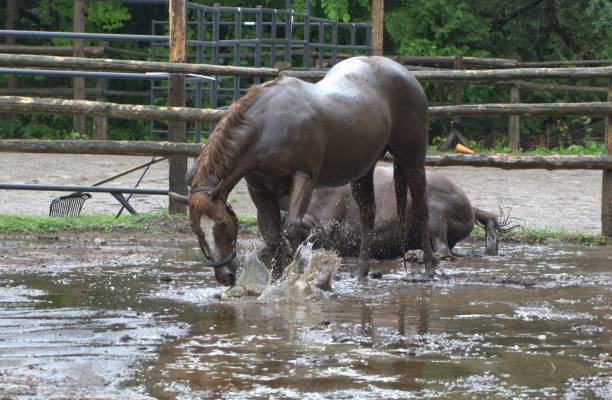
I hate rain. I know we need some, but I prefer it to happen during the night, otherwise known as my inside time. During the day I like to occupy the parking space right in front of the clinic and refuse to move when anyone pulls in, or wander across the verdant fields around my spacious property, or any of a number of other top secret outdoor cat activities. For me, rain throws a large wrench in my plans. For horses, it’s a way bigger deal. We’ve had a whole lot of rain lately, so let’s talk about what that has meant for my Docs and the horses they care for.
The Incredibly Soggy Foot
Horses evolved on the steppes of Mongolia. It’s basically a colder, drier version of the United States Midwest. Not a lot of swampland or rain. This means their feet did not evolve with a water management system. Add shoes to this lack of evolutionary pre-planning and you’ve got a mess. The repeated wet-dry cycle we have here, or sometimes just wet, causes the tubules that make up the hoof wall to suck up water and swell. When they release that water, the tubules shrink again leaving empty space between the inter-tubular material and the tubules. This repeated cycle causes hoof walls to crack and split, and the soles to erode away. If your horse has shoes on, it makes those pesky nails get loose way before the next scheduled farrier visit.

Treat the Feet
Veterinarians in drier areas of the country look at Docs from the Gulf Coast like they’re crazy when they want to keep moisture out of a foot. The obvious solution to wet feet is to keep your horse inside unless it’s dry out. This will work, but it will also cause your grass to grow even faster, and your horse to do all their pooping where you have to micromanage it daily, if not more often. There are treatments that help to form a water barrier for the foot. Durasole is great on the bottom of the foot. Durasole should be applied every day until you can no longer easily move the sole with just thumb pressure. After that, 2-3 times per week will keep the soles in tip top shape. Venice Turpentine works well here, too. My Docs have found it doesn’t work once horses are foot sore, but if you start early in the season it will prevent mushy feet.
For hoof walls, products that are oil-based like Fiebings, and Dr. Lacher’s personal favorite, Pendray’s ProCare Plus, will help form a barrier to moisture. ProCare also contains copper which helps kill bacteria and fungus that love to eat wet feet. Keratex Hoof Hardener works great on wet hoof wall as well. These products should be applied right before turnout, and before hosing off. The more you can protect the hoof wall from water, the better you will do!
The Always Lovely Thrush
Moisture makes thrush. Do not beat yourself up if your horse has developed thrush during the rainy season. It can be incredibly difficult to keep horse thrush-free when it’s raining 1”-2” daily. Treatment can be straightforward if you can locate Tomorrow Mastitis ointment. Do not ask me why an ointment made for cow udders fixes thrush. Cats know a lot, but they don’t know the answer to this. Trust me here though, this stuff works. Now for the bummer: it’s almost impossible to find right now. If you do locate a secret stash, apply a small amount to the affected areas of the foot after a good cleaning. Spraying a little hydrogen peroxide on the area first will help clean the cracks and crevices. If you can’t find Tomorrow, go with copper sulfate crystals. These can be procured where all things can be found, Amazon, or often at your local pool supply store. You will also need a toilet bowl wax ring. Also available on Amazon, or at any hardware store. Mix a small amount of wax, and copper sulfate together. Smoosh into the affected area. Viola!! Thrush treatment extraordinaire.
Even more foot stuff
This is my miscellaneous paragraph. Abscesses are common this time of year thanks to all those soft, mushy feet. A sudden onset of severe lameness is the most common presentation. Definitely worth a chat with one of my awesome Docs, but also check out their YouTube video on how to bandage a foot with a diaper so you’re prepared to manage this common problem.
Can’t keep shoes on? Ask your farrier about glue-on options. These can be really great during wet season to keep you and your farrier from visiting every 2-3 days when those shoes are getting loose. And once again, before you go yelling at your farrier, this is a wet weather problem, not a farrier problem. Be nice to your farrier!
The Skin Funk

I have extensive tomes on rain rot, and the general Florida state of skin funk. It’s a constant battle here, even for this clean fanatic cat. Once again, attempt to keep your horse dry. HaHaHa!!! I’m a funny cat. Who can do that??? Anyway, Equishield CK shampoo, salve, and spray are your friends here. Trust me. The entire clinic has seen every product, lotion, potion, and crazy concoction your mother’s uncle’s friend’s neighbor has suggested. The CK line works every time. Once you have skin funk under control, once or twice weekly spritzes with CK spray will keep that skin looking perfect. Adding some omega fatty acids to your horse’s diet will also help the skin form a better barrier. This can be done with flax seed, or there are a few omega supplements out there. My feelings on supplements are notoriously poor so I’d recommend checking with my Docs to make sure you got a supplement worth feeding.
Until next week,
Tony
P.S. Starbucks has Pumpkin Spice Latte so I’m sure drier weather will be coming soon. I know cooler weather isn’t coming. This is Florida, after all! Need help with your horse’s wet weather problems? Give my Docs a call. They have loads of experience handling the hot, wet Florida weather. Or, looking for a great learning podcast while enjoying your warm (or cold) beverage, be sure to check out my docs podcast, Straight from the Horse Doctor’s Mouth
Tuesdays with Tony is the official blog of Tony the Clinic Cat at Springhill Equine Veterinary Clinic in Newberry, Florida. If you liked this blog, please subscribe below, and share it with your friends on social media! For more information, please call us at (352) 472-1620, visit our website at SpringhillEquine.com, or follow us on Facebook!


You must be logged in to post a comment.